Your First Space
Set your workspace root, create a project, run a small task, and find its files, todos, and sessions.
Start with Space running and one folder of work. This walkthrough connects the project on disk to the views you use to follow it.
1. Open the workspace
Open the URL printed by the installer, usually http://localhost:5002/space/. The current UI opens on Projects → Overview, where the map groups projects by purpose.
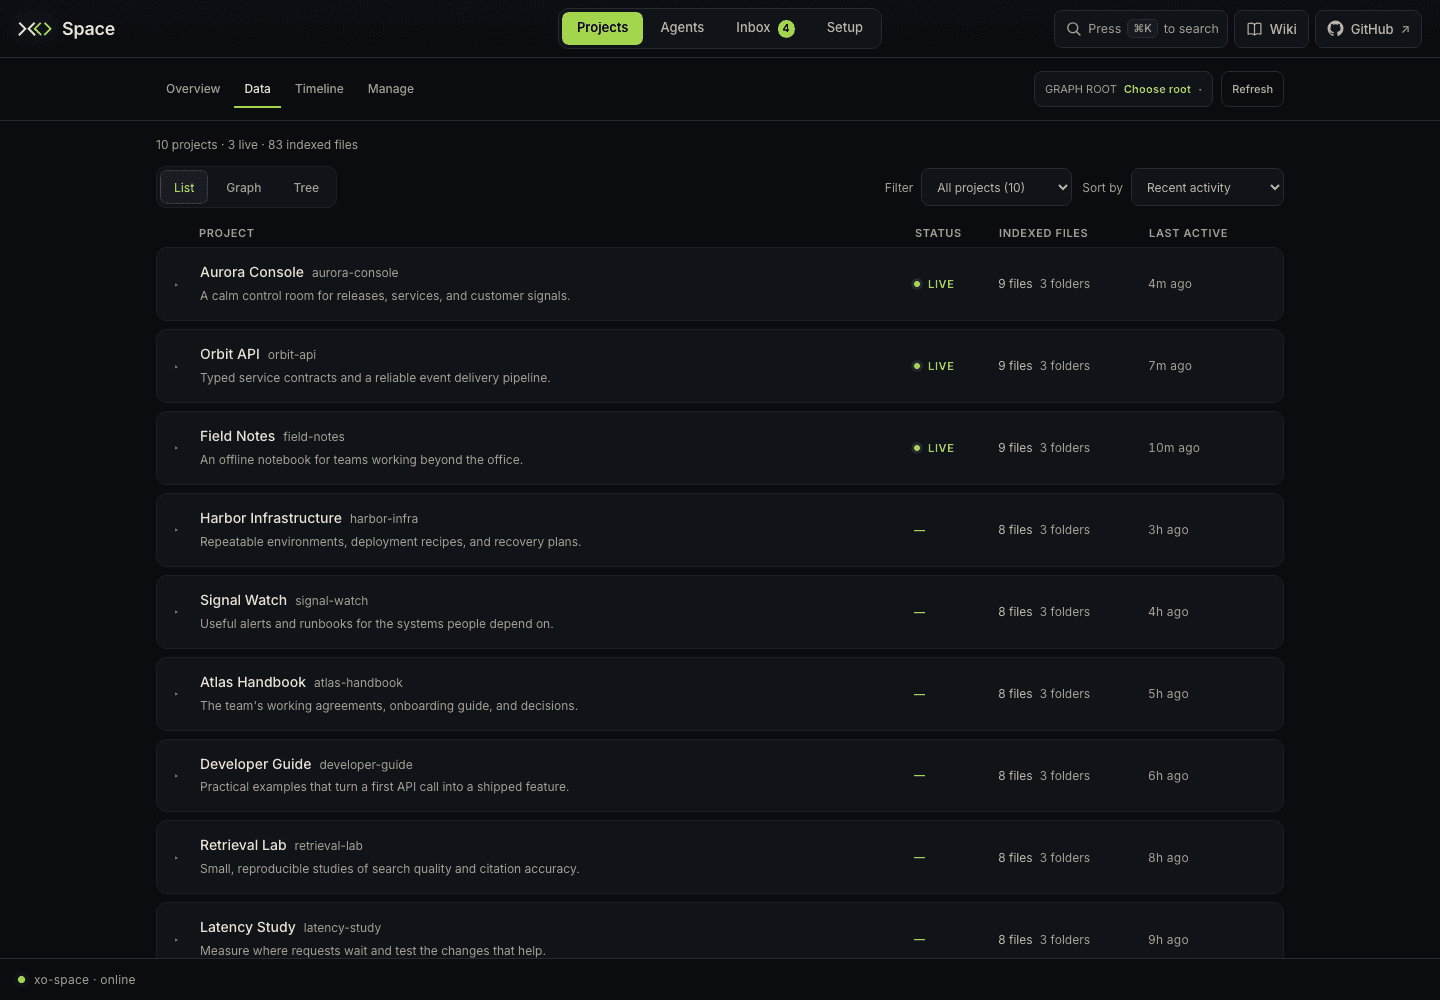
Use Data for List, Graph, and Tree, Timeline for Git history, and Manage for project actions. Clicking Projects returns to Overview. The other primary tabs are Agents, Inbox, and Setup. Use the top-right Search button or ⌘K / Ctrl+K to jump to a page or project.
2. Check the roots
Open Setup → Workspace and check Projects folder. A project is a direct child folder of that root. If the folder you want is elsewhere, change the root or put the project under it. Changing the root changes what Space reads; it does not move your project folders.
Check the separate Space data folder (.quirq state root) too. It holds machine-local configuration,
watcher state, and telemetry, rather than your project deliverables.
An empty workspace is expected. Setup and Wiki work immediately. Project maps need folders, git history needs commits, and session telemetry needs a readable supported runtime store. Use Projects → Manage to add an existing repository.
3. Add a project
For an existing Git repository, open Projects → Manage, choose Add project,
enter its Git URL and local folder name, and clone it into the selected root.
Existing folders placed directly under that root also appear in Data → List.
The watcher adds missing canonical .xo/ records without replacing existing
files or adding operating documents to a plain clone.
For a new project with the standard operating documents, ask an agent with the
xo-projects skill:
Create an xo-project called
hello-spacefor a short project note.
The skill discovers the configured root and creates the folder through Space's
API. The scaffold includes AGENTS.md, PROJECT.md, OBJECTIVES.md, PLAN.md,
PROGRESS.md, memory/, and .xo/ metadata. Fill the template documents with the
project's actual purpose and plan.
You can also call the API directly. First read the root:
curl -fsS http://localhost:5002/api/config/workspaceThe response contains roots and default. Use roots[default] as the
projects root, and replace /absolute/path/to/workspace below with that value:
curl -fsS -X POST http://localhost:5002/api/files/mkdir \
  -H 'Content-Type: application/json' \
  -d '{"path":"/absolute/path/to/workspace/hello-space","scaffold":true,"display_name":"Hello Space"}'
The target must be a direct child of the configured root. An existing folder
returns 409; choose another name instead of overwriting it.
4. Run a small, verifiable task
Start your normal coding agent from the project folder, using its normal login.
For example, ask it to create hello.md with the project's purpose and one next
step, then read the file to confirm the result.
Space can observe work launched outside its UI. Choose the runtime in Setup → Intelligence layer only when you need to change which backend handles prompts sent through Space's chat API. The bundled Space interface has no Chat tab; continue using your terminal, editor, or API client to run the agent.
If you use the xo-projects skill, ask it to record work through the project todo
API as it progresses. A runtime's private todo tool is not automatically mirrored
into Space's shared todo list.
5. Inspect the project
Return to Projects → Data → List, refresh, and open the project row.
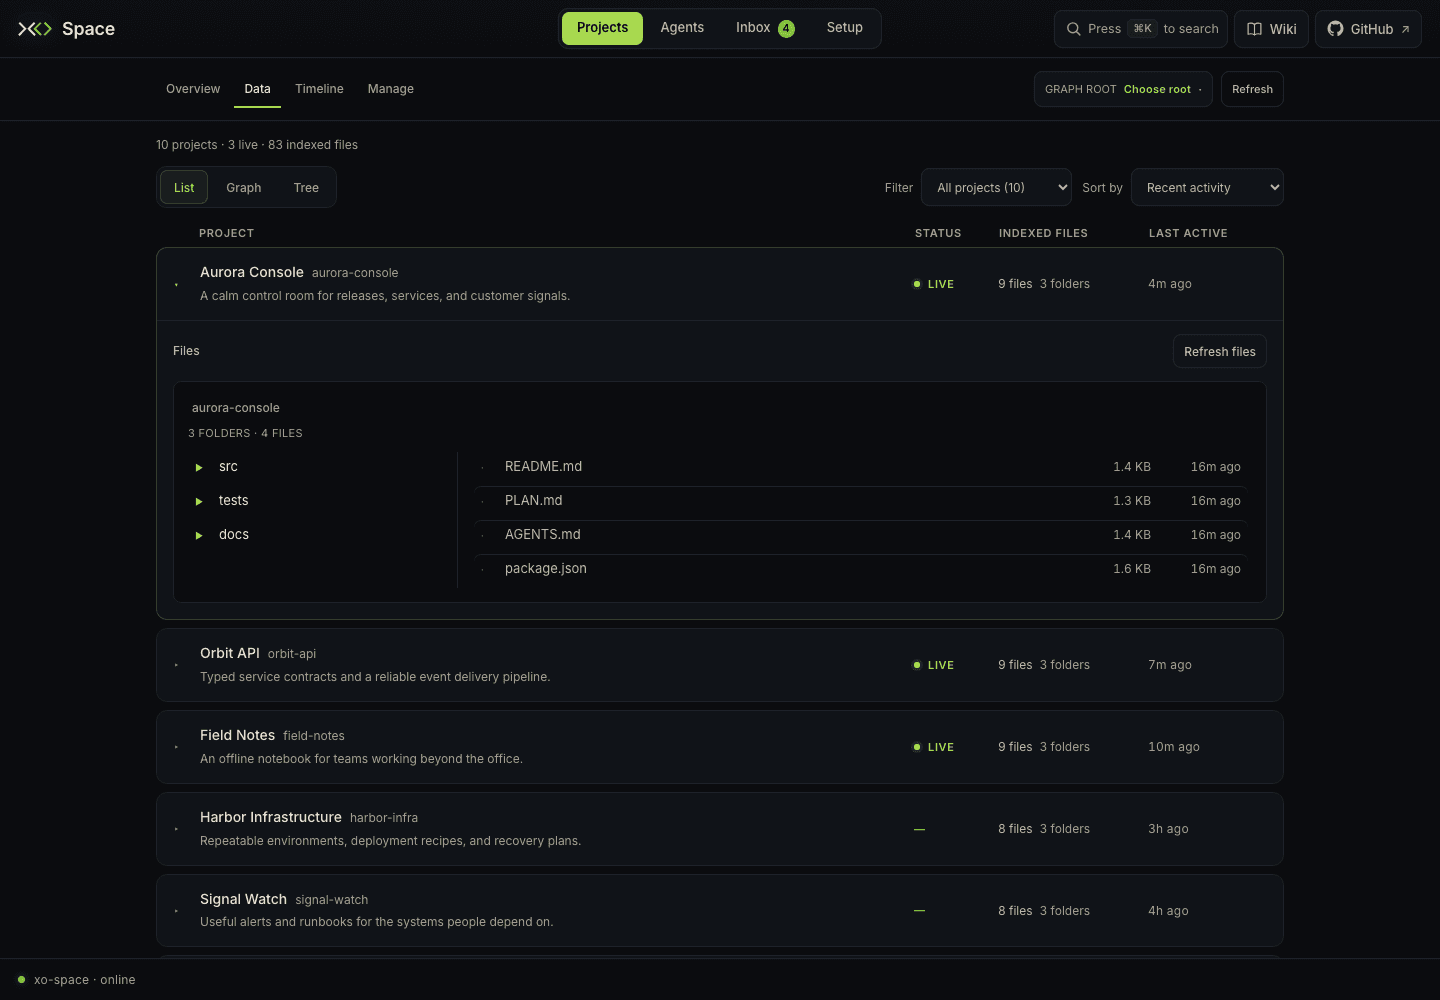
- Navigate folders with breadcrumbs and open
hello.mdin the file preview. Markdown renders; Source shows the underlying text. The version picker opens committed versions when Git history is available. - Select the project in Overview to inspect its recorded todos.
- In Manage, expand the project card for metadata and GitHub Issues. Its View activity action opens the project's observed events in Inbox.
- Use Data → Graph for relationships and Data → Tree for the folder hierarchy. File previews remain open across these Data views.
6. Follow the work over time
Open Agents → Overview for runtime summaries, select sources and a time window, then inspect Agents → Sessions. The Sessions table covers all loaded sessions for the selected sources. Trends combines weekly, model, and tool breakdowns; Configure shows source status, collection switches, and editable source paths. The current aggregate dashboard supports Claude Code, Codex, and Cursor. Missing telemetry or unavailable cost is not evidence that no work occurred.
Open Projects → Timeline after the project has Git commits. File dates and commit lanes come from Git; creating a file does not give it a committed date. Review Inbox → Items for incoming work and Activity for observed project events. Inbox → Jobs monitors recurring saved commands. Create, edit, or run any saved command in Setup → Commands.
If something is missing
| Symptom | Check |
|---|---|
| Project is absent | It must be directly under the XO projects root shown in Setup. Refresh Data → List after the watcher has run. |
| Files appear but todos do not | Create/update the todo through /api/xo-projects/{id}/todos; the watcher does not mirror native task tools. |
| No live activity | Check the runtime's native store, watcher source mode, and project working directory. |
| Agents shows no usable source | Check runtime discovery; only available telemetry providers can contribute. |
| Timeline has no commit points | The project needs its own git repository with commits. |
| Sharing or Connectors asks for sign-in | Those features use XO identity and external services; local file browsing does not. |
Continue with the complete UI guide or learn how to interpret observability data.