Install Space
Install the local server, choose your workspace and runtime, and learn how to start, update, and remove it.
Install XO Space in the directory that should contain your projects. The installer prepares Python and starts the server; you supply the coding agent you want to run.
Requirements
Use Linux or macOS. On Windows, run the installation and your agents inside WSL;
native Windows is not supported. You need git and a working curl command.
Docker is not required.
The installer fetches uv when needed, creates a Python 3.12 virtual environment,
and installs Space's Python requirements. Other tools enable specific features:
| Tool | Needed for |
|---|---|
| An authenticated agent CLI or gateway | Running prompts through that agent |
node and npm | Installing Node-based agent CLIs |
gh | GitHub issue polling and project backup |
rclone | Drive and OneDrive file connectors |
gpg | Encrypted backup and restore |
Missing optional tools are reported at startup. They do not prevent you from browsing local projects.
Install and open
Choose a workspace directory, open a terminal there, and run:
curl -fsSL https://quirq.ai/install | shThe command clones xo-space into that directory, creates xo-space/venv, writes
initial configuration to xo-space/.env, and creates .quirq/ for local state.
It prints the resolved roots, readiness checks, log paths, and browser URL.
Open http://localhost:5002/space/, or the URL printed
by the installer if it selected another port. Keep the terminal running. The
server runs in the foreground; Ctrl-C stops it.
The public command installs main, the release branch. To try the development
UI shown in these guides, use
curl -fsSL https://quirq.ai/install | QUIRQ_SOURCE_REF=development sh.
Development can contain changes that have not reached the release branch.
Check Setup before running an agent
Open Setup → Workspace and check the XO projects root and machine-local state root. Then use Intelligence layer for the active chat backend and native session sources.
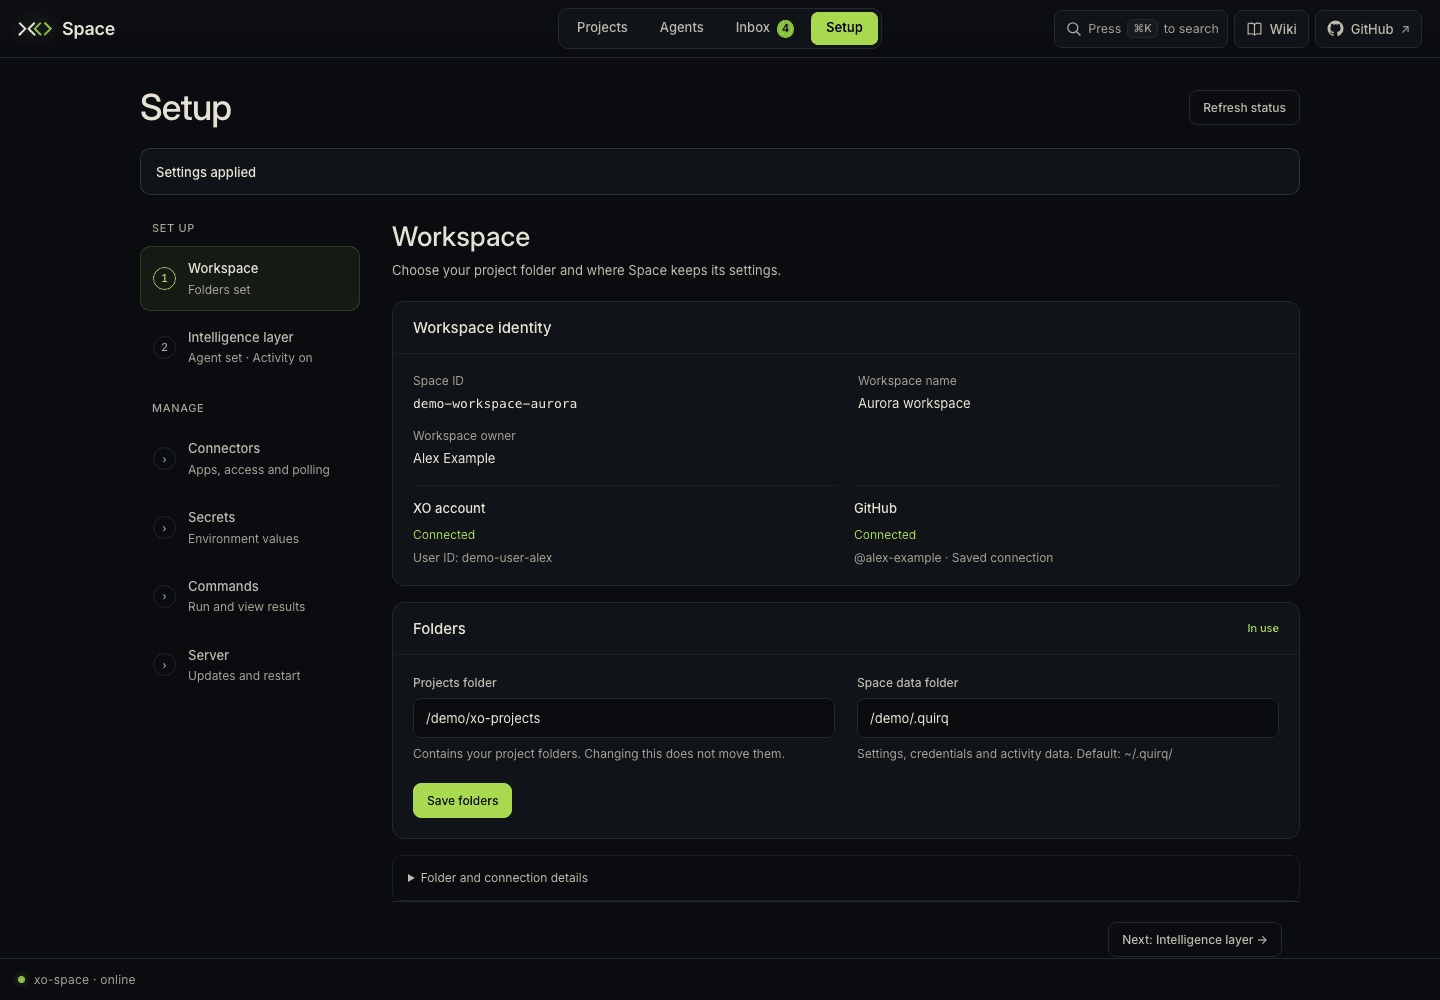
The installer defaults to claude_code, watches all supported installed runtime
sources, and skips agent installation. Install and authenticate your chosen agent
using its normal workflow. For example, if you use Claude Code:
npm install -g @anthropic-ai/claude-codeAn existing native login can supply authentication. Setup also supports write-only credential fields for runtimes that use environment credentials. Installing Space does not supply an agent subscription, API key, or OAuth login.
See runtime discovery when an executable or session store is missing.
Understand the install directory
For a fresh install started in your workspace:
workspace/
├── xo-space/                 server checkout and Python environment
│   ├── .env                  install configuration
│   └── venv/
├── .quirq/                   machine-local configuration and telemetry
│   ├── logs/quirq.log         server output
│   ├── logs/commands.log      external commands run by Space
│   ├── projects/             durable history and watcher cursors
│   ├── cache/                rebuildable views and live presence
│   ├── settings/             roots and runtime controls
│   └── secrets/              saved credentials
├── .xo/                      portable workspace records
└── my-project/               your files and canonical project .xo/ metadata
Your agents' native conversations stay in their own home directories. Project
stats and session indexes are under .quirq/projects/; workspace graphs and
session aggregates are under .quirq/cache/.
Start again or update
From the workspace directory:
# Start the existing checkout without fetching an update
./xo-space/install.sh

# Update the managed checkout, then start it
curl -fsSL https://quirq.ai/install | sh
The update path preserves a checkout with local changes or one on a different branch. Read the startup message if an update is skipped. The installer does not add a system service, scheduled job, or login item.
Setup → Server shows the restart capability of the running process. Supported native runners and managed deployments can restart through that control. For an unsupervised foreground process, stop and rerun the installer yourself. See server controls.
Change configuration
The installer creates .env once and preserves later edits. Common settings are:
| Setting | Fresh local install default | Meaning |
|---|---|---|
XO_PROJECTS_ROOT | Directory where you launched the installer | Its child folders are projects. |
QUIRQ_STATE_ROOT | .quirq in that directory | Machine-local state and logs. |
AGENT_NAME | claude_code | Active chat backend; also supports codex, openclaw, hermes, antigravity. |
QUIRQ_WATCHER_SOURCE_MODE | all | Watch all configured runtime sources; active limits watcher ingestion to the active backend. |
HOST | 127.0.0.1 | Listening interface. |
PORT | 5002 | Preferred port. |
QUIRQ_SKIP_BOOT_INSTALL | 1 | Skip system/agent bootstrap installation. |
UVICORN_RELOAD | false | Enable server reload for development. |
For an install-time override:
curl -fsSL https://quirq.ai/install | PORT=8080 shExported settings override .env; settings saved through Setup may take precedence
for the runtime and credentials it manages. Root selections are also persisted
in <state root>/settings/roots.env. Setup shows the effective configuration, which is the useful
place to check when an environment edit appears not to take effect.
Keep the state root outside project folders. The default hidden .quirq/ directly
under the workspace is allowed; other nesting combinations are rejected to avoid
copying projects into machine-local state during relocation.
Install from a clone
For a checkout you manage yourself:
git clone https://github.com/quirq-ai/xo-space.git
cd xo-space
./install.sh
This uses the checkout in place without fetching or resetting it. With no saved
root configuration, the launch directory becomes the workspace. Choose explicit
roots in Setup if you want projects elsewhere. For code changes, follow the
contributor setup, which starts from development.
Remove a local install
Preview what removal would do:
./xo-space/uninstall.sh --dry-runThen run ./xo-space/uninstall.sh when ready. It stops the server and removes
managed installation/state files while preserving project folders by default.
Read its summary: a checkout with local changes is kept, and native agent
installations are separate from Space.
Prefer hosting instead? Open XO Managed Cloud. Otherwise continue with your first Space.